Skip to content

Sourdough Essentials: The BakeClass Picks

The equipment we would actually buy for baking sourdough at home - and the things you can safely leave until later.

There is a lot of sourdough equipment for sale and most of it is optional. This page is the short list: eight things we own, use and would buy again. For each one, honest notes on what it does, what irritates us about it, and whether you actually need it at all. A few things are worth saying up front. You do not need a stand mixer. You do not need a ceramic crock. You do not need a purpose-made baker's blade, because it is the same blade shavers buy a hundred at a time. And the single item that will improve your bread most costs less than a takeaway. If you are starting from nothing, buy the four things in the box below and ignore everything else on this page until you have baked a few loaves. Everything here is something we own. Where we have made an expensive mistake, we have said so.

Some links on this page are affiliate links. If you buy through them, BakeClass may earn a small commission at no extra cost to you. As an Amazon Associate, BakeClass earns from qualifying purchases.

Starting from scratch? Buy these four.

You do not need everything on this page. These are the ones that make the difference between a loaf that works and one that does not.

Everything in this kit

Narrow it down

Importance
Experience level
Budget
Buy stage

Showing 8 of 8 items

The full write-ups

BOMATA Large Kitchen Scale, 0.1g Precision, 5kg

EssentialBuy firstBudget

The cheapest thing on this page and the one that changes your baking most. If you buy nothing else here, buy scales, and start weighing your water.

Do I actually need one? YesBest for Everyone. This is the first thing to buy and the cheapest problem to solve

Yes, and this is the one thing on this page there is no argument about. Sourdough runs on ratios, and ratios only work if the numbers are real. Cups and spoons are fine for herbs and spices. They are not fine here. The worst offender is water: almost everyone measures it in a jug because the jug has millilitres printed on the side. Try this once. Fill a jug to what the markings say is 300ml, then put it on scales. It will almost certainly not weigh 300g. That gap is why your dough is wetter or stiffer than the recipe intended, and why you cannot work out what went wrong. Weigh your water.

What it does, and why this one

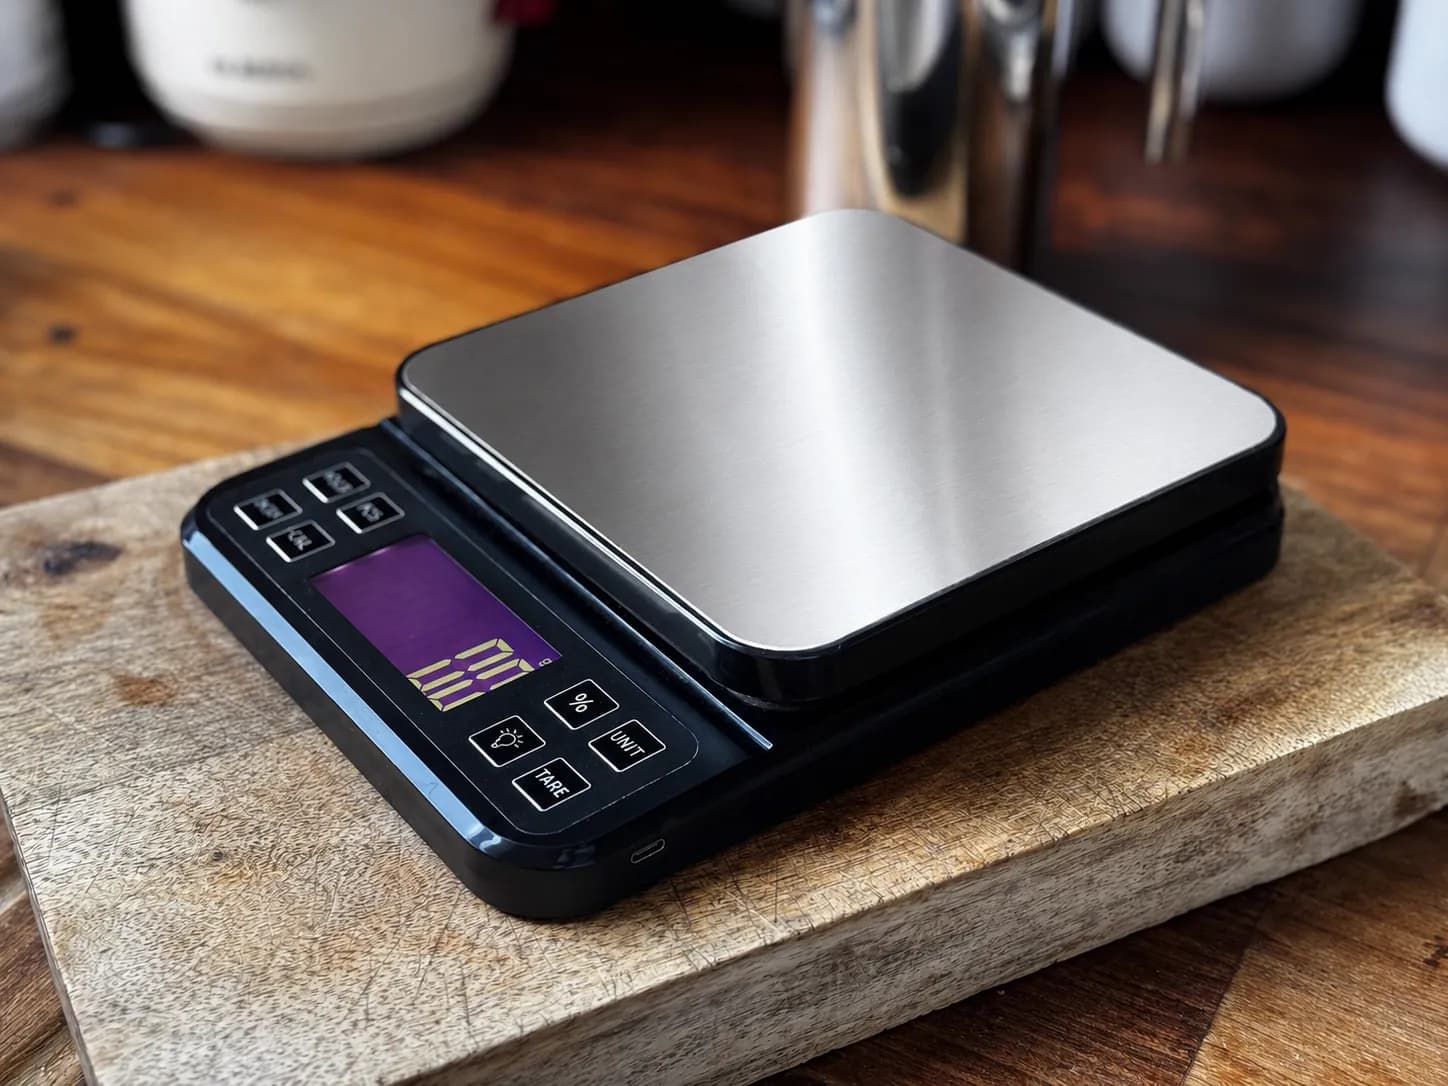
Weighs your ingredients so a recipe's ratios survive contact with your kitchen. Flour, water, salt and starter all go on by weight, and the tare button lets you zero the display between each one so everything can go into the same bowl without any mental arithmetic.

They also weigh in percentages, which is worth explaining because it is aimed directly at bread baking. Bakers work in ratios rather than fixed weights - the flour is 100% and everything else is expressed against it - and this scale will do that arithmetic for you rather than making you do it on paper. If you are scaling a recipe up or down, or working from a formula written in baker's percentages rather than grams, that is a real advantage over a generic set of scales. They read down to 0.1g, which is the detail that makes a second set of scales unnecessary. That is fine enough for salt and for the small quantities of starter a sourdough recipe asks for, so one set of scales covers everything. They also charge over USB-C, which sounds trivial and is not: plenty of rechargeable kitchen gadgets ship with a proprietary cable, and the day you lose that cable the device is finished. USB-C means any phone cable in the house will charge it. The 5kg capacity is more than enough to sit a full bowl of dough on the platform, and they have survived being splashed repeatedly, which matters because if you are weighing water properly the scales are going to get wet.

Pros

  • Reads to 0.1g, so no second set of scales for salt or starter
  • Percentage mode for anyone working in baker's percentages
  • USB-C charging, so any phone cable in the house will do
  • A year in and still on the original charge cycle
  • Shrugs off water and wipes clean
  • Ships with a 100g calibration weight
  • Falls back to AAA batteries if the charge runs out mid-bake

Cons

  • The tare button sometimes needs a second press before it re-zeroes
  • Auto-offs when left idle, so stepping away mid-recipe means a blank display

Our experience

I bought these in May 2025 and they are still on the same charge cycle, which is the opposite of my experience with battery-powered scales. They get wet regularly, because I weigh water rather than measuring it in a jug, and they have never missed a beat - a quick wipe and they are as good as new. They have gone up a few pounds since I bought mine and I would still buy them at the higher price. In the interests of honesty, I have never once used the percentage function. The recipes I bake are like for like, the exact quantity the recipe calls for, so I have never needed to scale anything. If you do work that way it is a genuine bonus, but I am not going to claim credit for using a feature I do not. Worth admitting a mistake here too: before these I bought a set of jewellers scales, on the assumption that weighing yeast and other small quantities would need finer resolution than a normal kitchen scale could manage. They now live in a cupboard. Because these read to 0.1g, the jewellers scales come out perhaps twice a year for something unusually fiddly, and never for sourdough.

Alternatives

Any scales that read to 0.1g with a working tare button will do the job. If you are choosing between models, pick the one that charges with a cable you already own. What you do not need is a second set of jewellers scales for the small quantities - I bought those first and they were a waste of money.

Will you outgrow it?

No. There is no advanced version of weighing things. Scales that work now will work in ten years, and the only reason to replace these would be losing them.

Works well with

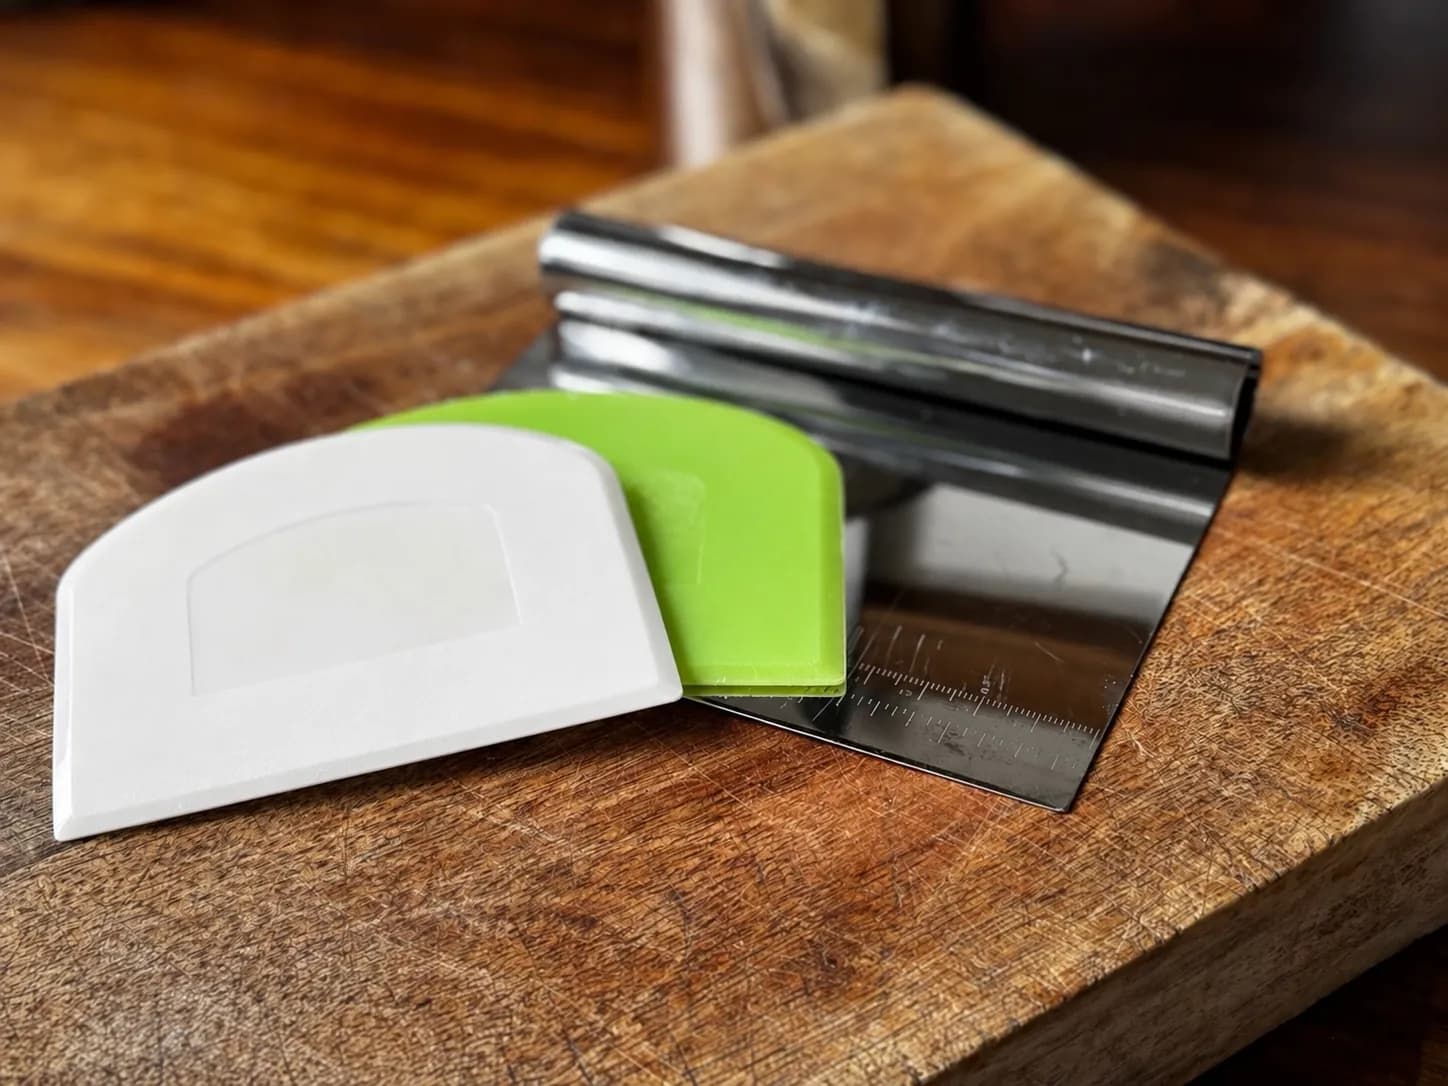
Vicloon Dough Scraper Set, 3 Piece, Steel and Plastic

EssentialBuy firstBudget

The cheapest thing that will most improve how the dough behaves in your hands, mainly by keeping it out of them. Buy the set rather than a single scraper - you will use both types, for different jobs.

Do I actually need one? YesBest for Everyone, from the first loaf onwards

Yes, and buy them before your first loaf rather than after it. Wet dough sticks to hands far more than it sticks to steel or plastic, so without a scraper you end up working the dough with your fingers, stopping to wash them, and starting again. That is not just tedious. Dough picks up heat from your hands, and temperature is one of the few variables in sourdough you have any control over. A scraper keeps your hands out of it, which keeps the dough cooler and the process quicker.

What it does, and why this one

Two jobs, which is why the set has two kinds. The flexible plastic ones get dough out of a bowl, following the curve so nothing is left behind. The rigid steel one works on the bench: dragging it underneath a shaped ball tightens the surface tension, which is how you get a loaf that holds its shape rather than spreading, and its straight edge divides dough into even pieces cleanly. It also scrapes the worktop clean afterwards, which is a job in itself.

You want both materials, and a set is the tidy way to get them. The curved plastic blades matter more than they look: if you mix in a stand mixer bowl with near-vertical sides, there is effectively a corner where the wall meets the base, and a straight steel edge cannot reach into it. The curve can. The steel one is rolled over at the top rather than fitted with a separate grip, which is one less part to perish or trap dough.

Pros

  • Covers both jobs, bowl and bench, in one purchase
  • Curved plastic blades reach into a stand mixer bowl properly
  • Steel edge is rigid enough to divide dough and tighten a shaped ball
  • Dishwasher safe
  • Three years in with no rust and no visible wear

Cons

  • The plastic scrapers are stiffer than ideal for a straight-sided bowl
  • They slip through the dishwasher rack and end up on the floor of it
  • The listing mentions a rubber handle, which the 3-piece set does not have

Our experience

Three years of use, cleaned in the dishwasher every single time, and they are essentially as new. No rust on the steel one at all. I use all three, which surprised me - I expected one of the plastic ones to end up in a drawer. The plastic ones live with the bowl and the steel one lives on the bench, and they genuinely get about equal use. The measuring scale printed on the steel one I have used exactly once, cutting even strips for Chelsea buns. It is a nice thing to have and I would not choose a scraper for it.

Alternatives

If you only ever buy one, buy the steel bench scraper - it is the more versatile of the two. If you mix in a stand mixer, consider adding a softer, more flexible plastic scraper alongside this set rather than instead of it.

Will you outgrow it?

No. A stainless scraper is a lifetime object, and the plastic ones show no sign of wearing out after three years of dishwasher cycles.

Works well with

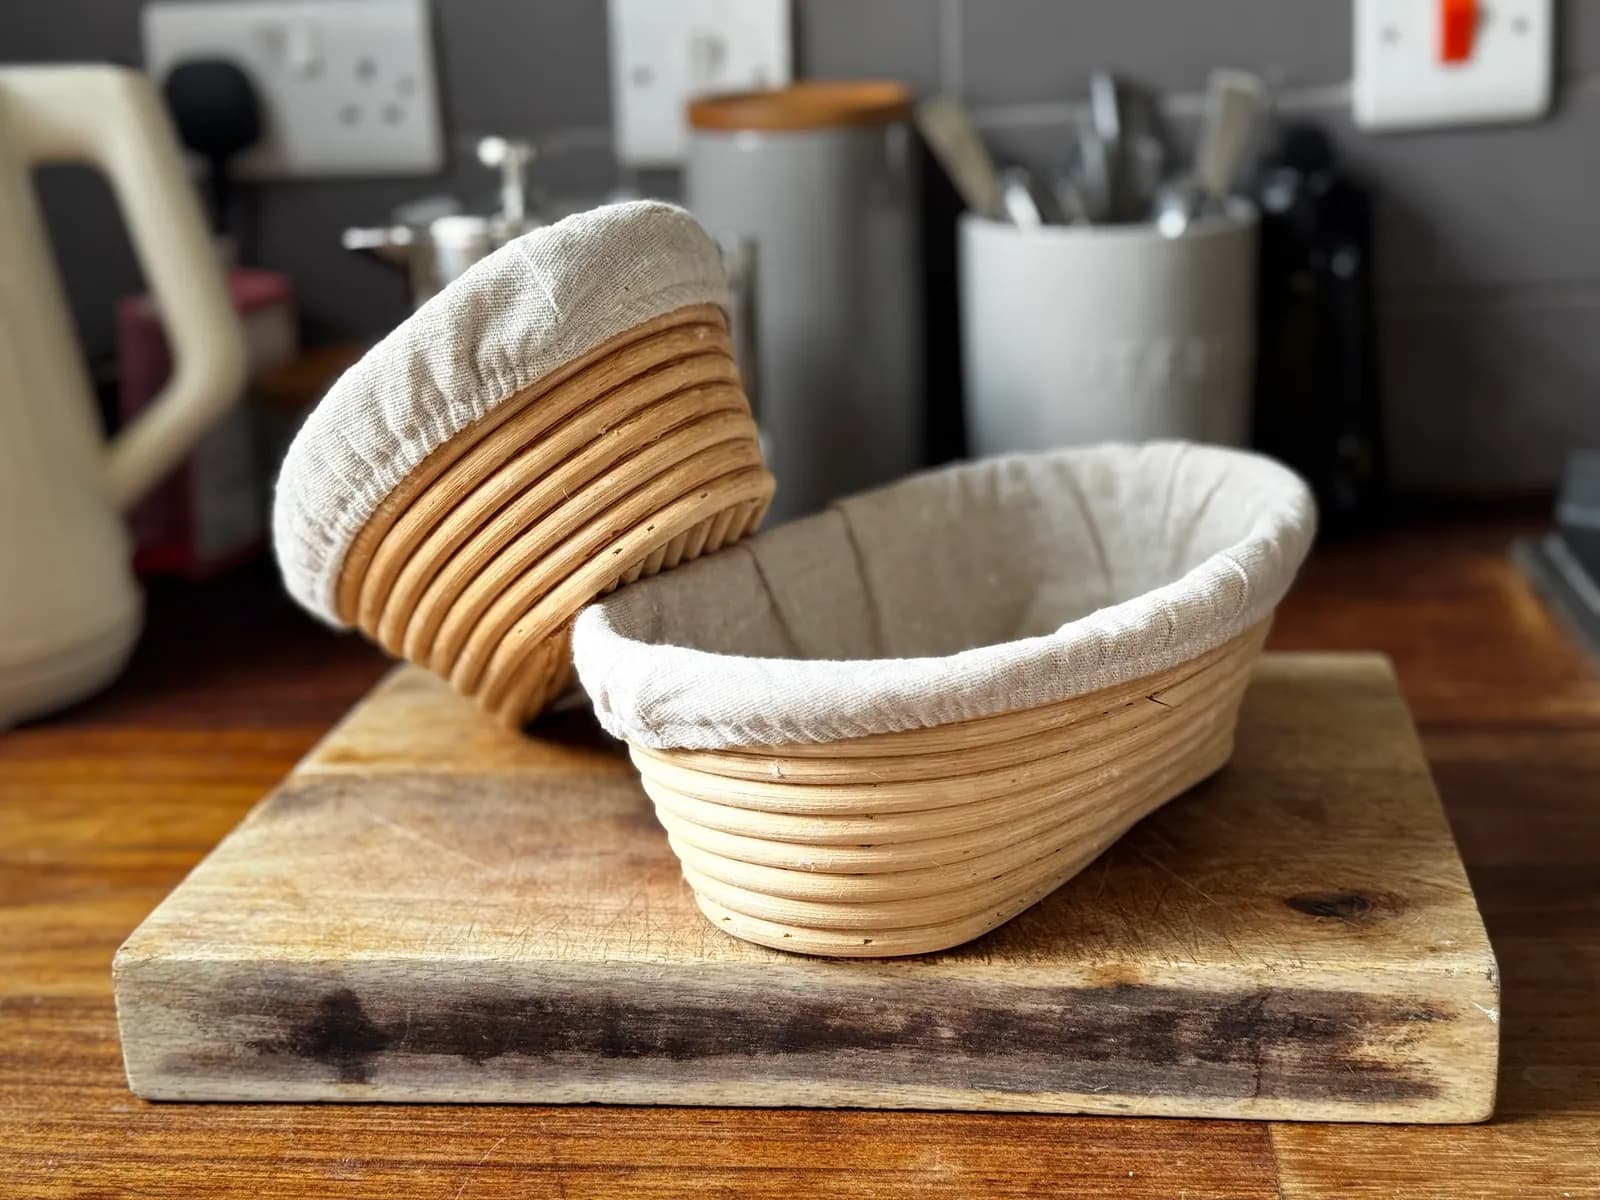
ifsecond Oval Banneton Set, 25cm, with Linen Liners

EssentialBuy firstBudget

Cheap, lasts for years, and it is the difference between a loaf that holds its shape and one that spreads. Buy the two-basket set rather than a single, and use the covers.

Do I actually need one? ProbablyBest for Anyone baking their first few loaves who wants them to hold their shape

You can prove a loaf in a bowl lined with a tea towel, and plenty of people start that way. It works better in theory than in practice. Unless the bowl and the towel are well matched the towel bunches up, the dough works its way into the folds, and getting it out again without deflating it is a job. What you bake is fine. What it looks like is creased. A banneton is cheap enough that this is a problem worth just buying your way out of.

What it does, and why this one

Supports the dough while it proves, so it rises upward rather than spreading outward, and holds the shape you gave it when you shaped it. The cane leaves the spiral ridge pattern on the crust that most people picture when they picture a sourdough loaf. That is not only decorative. A loaf that has held its shape through the prove bakes taller and opens up better when you score it.

Two baskets rather than one, which matters more than it sounds. Sourdough runs on a schedule and the moment you want to bake two loaves, or start the next batch before the first is out of the oven, one basket becomes the thing you are waiting on. The cotton covers are included rather than sold separately, and the oval shape suits a batard, which is the easier shape to get right early on than a round boule.

Pros

  • Cane holds its shape and does not soften with use
  • The linen covers make cleaning a non-issue
  • Two baskets, so you are never waiting on one between bakes
  • Oval is a forgiving shape to work with early on

Cons

  • Dough stuck to bare cane is genuinely awkward to get out of the weave
  • Damp dough left in cane will go mouldy, so clean it promptly

Our experience

I bought this set in August 2023 and both baskets are as good as new three years on. Before I bought them I tried the bowl and tea towel approach twice. My bowls were too small and the tea towels too big, so the towel bunched up in the bottom, the dough got caught in the folds, and getting it back out was a struggle. The loaves came out with the creases and overlaps printed into the crust. They tasted the same. They did not look the same.

Alternatives

A round banneton if you prefer boules to batards. There is no meaningful upgrade to make here.

Will you outgrow it?

Not something you outgrow. Cane bannetons last for years with no real maintenance, and mine show no sign of needing replacing. If you end up baking several loaves a week you will want more of them, not better ones.

Works well with

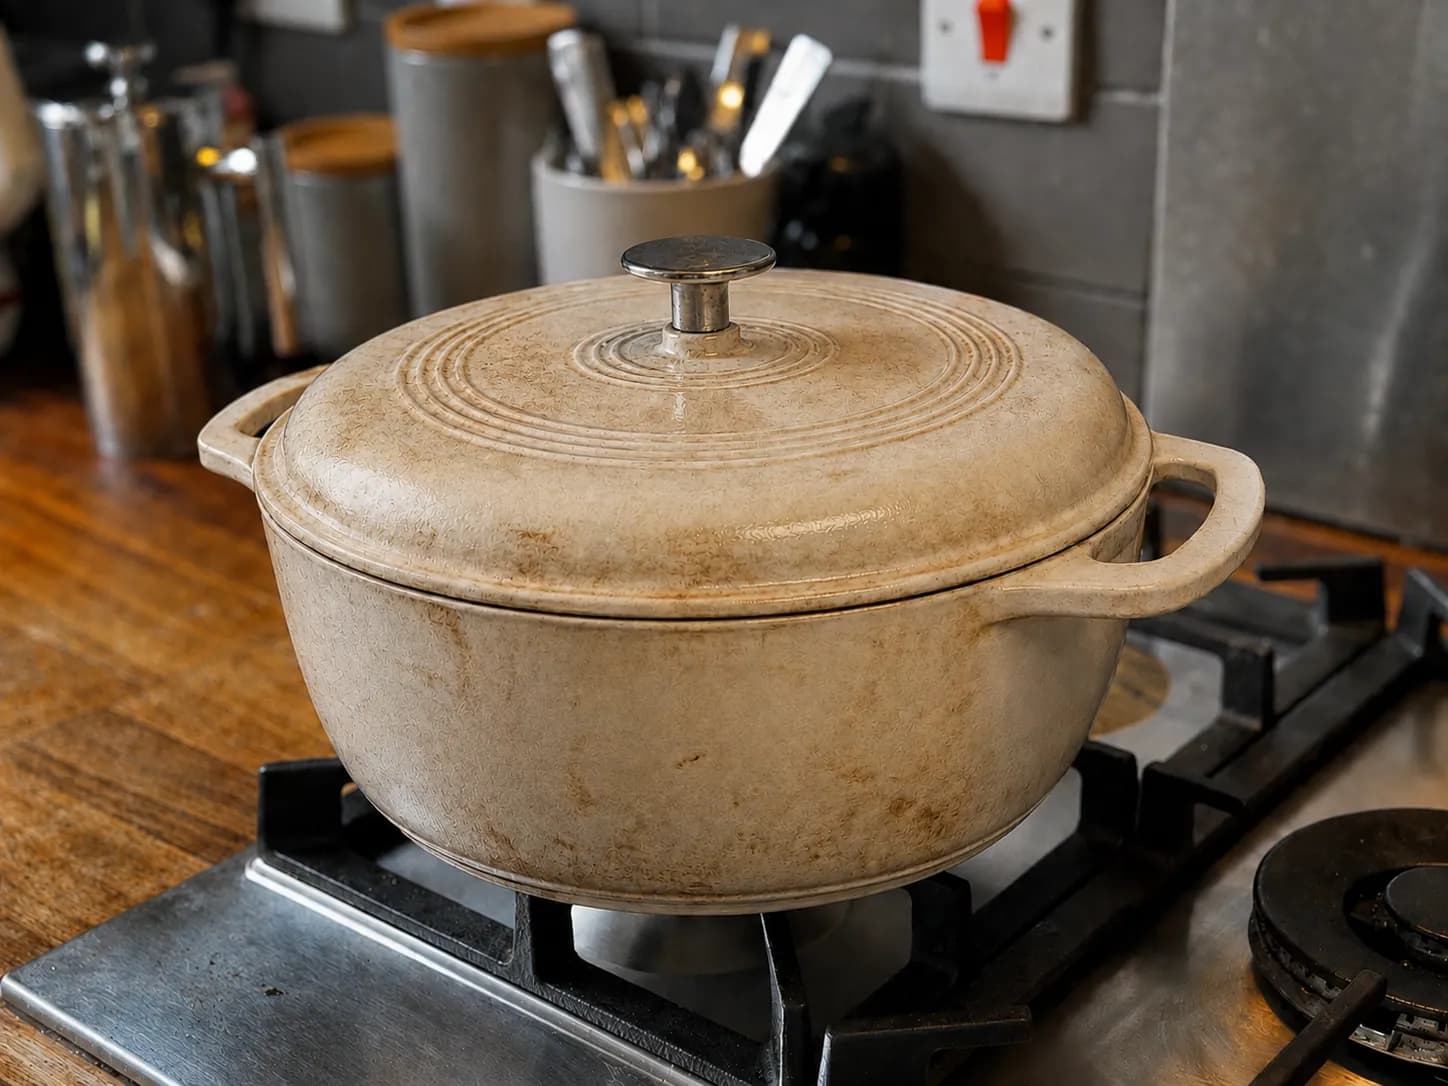
Amazon Basics Enamelled Cast Iron Dutch Oven, 5.7L

EssentialBuy firstBudget

Buy this one. Four and a half years of empty preheats at 250C, no chips, no damage, and it costs a fraction of what the premium brands ask. Other than the name on the side, I cannot think of a reason to spend more. Expect it to go from cream to dark brown and stop worrying about it.

Do I actually need one? YesBest for Anyone baking sourdough at home, and anyone who also makes stews

You need something heavy with a lid, and this is the cheapest way to get it. A professional bread oven injects steam for the first part of the bake, which keeps the crust soft long enough for the loaf to expand properly before it sets. A covered cast iron pot does the same job by trapping the steam the dough gives off. Bake a sourdough loaf uncovered on a tray and it will set early, stay pale and rise less. This is the single piece of equipment that most changes how the finished loaf looks.

What it does, and why this one

Preheats to oven temperature, holds that heat when cold dough goes in, and traps the loaf's own steam under the lid for the first part of the bake. Take the lid off for the last stretch and the crust colours and crisps. The result is oven spring and a proper crust from a domestic oven that has neither steam injection nor a stone floor.

It costs a small fraction of what the premium enamelled brands charge - the equivalent Le Creuset is several times the price - and it does the same job. The 5.7L round size matters if you are using oval bannetons - an oval loaf needs the extra width, and a smaller pot would crowd it. If you are proving in round bannetons you could size down. It is also not a single-purpose bread gadget, which is part of the value: it is a good casserole for stews and slow cooking, and it is what I use for boiling a large quantity of potatoes when the whole family is over.

Pros

  • A fraction of the price of the premium brands, with no difference we can detect
  • Handles repeated 240 to 250C empty preheats with no damage
  • No enamel chipping in four and a half years
  • 5.7L suits an oval loaf properly
  • Genuinely useful for cooking that is not bread

Cons

  • White enamel stains badly. Ours has gone from cream to dark mahogany
  • Scrubbing the staining makes it look worse, not better
  • Heavy at 6.3kg, and awkward out of a 250C oven
  • Amazon flags it as frequently returned, so check the rim on arrival

Our experience

I bought mine in December 2021 and it has baked sourdough regularly ever since. I preheat it empty at 240 to 250C for twenty minutes to half an hour, lid on for roughly three quarters of a 35 to 40 minute bake, then lid off to colour the crust. Nothing has ever gone wrong with it. No chipping, no crazing, no warping, despite years of that treatment. I did season the bare enamel rim and the underside of the lid when it was new, on the basis that it seemed like a good idea. I have never done it since and it has made no observable difference, so I would not bother again. The only thing that has changed is the colour, and I have stopped trying to fix that.

Alternatives

A bare cast iron combo cooker if you prefer no enamel at all. A premium enamelled brand if you want it to look good for longer. Neither will bake a better loaf.

Will you outgrow it?

No. Cast iron outlives its owner. The only reason to buy another is wanting a second one, or a different size for a different loaf shape.

Works well with

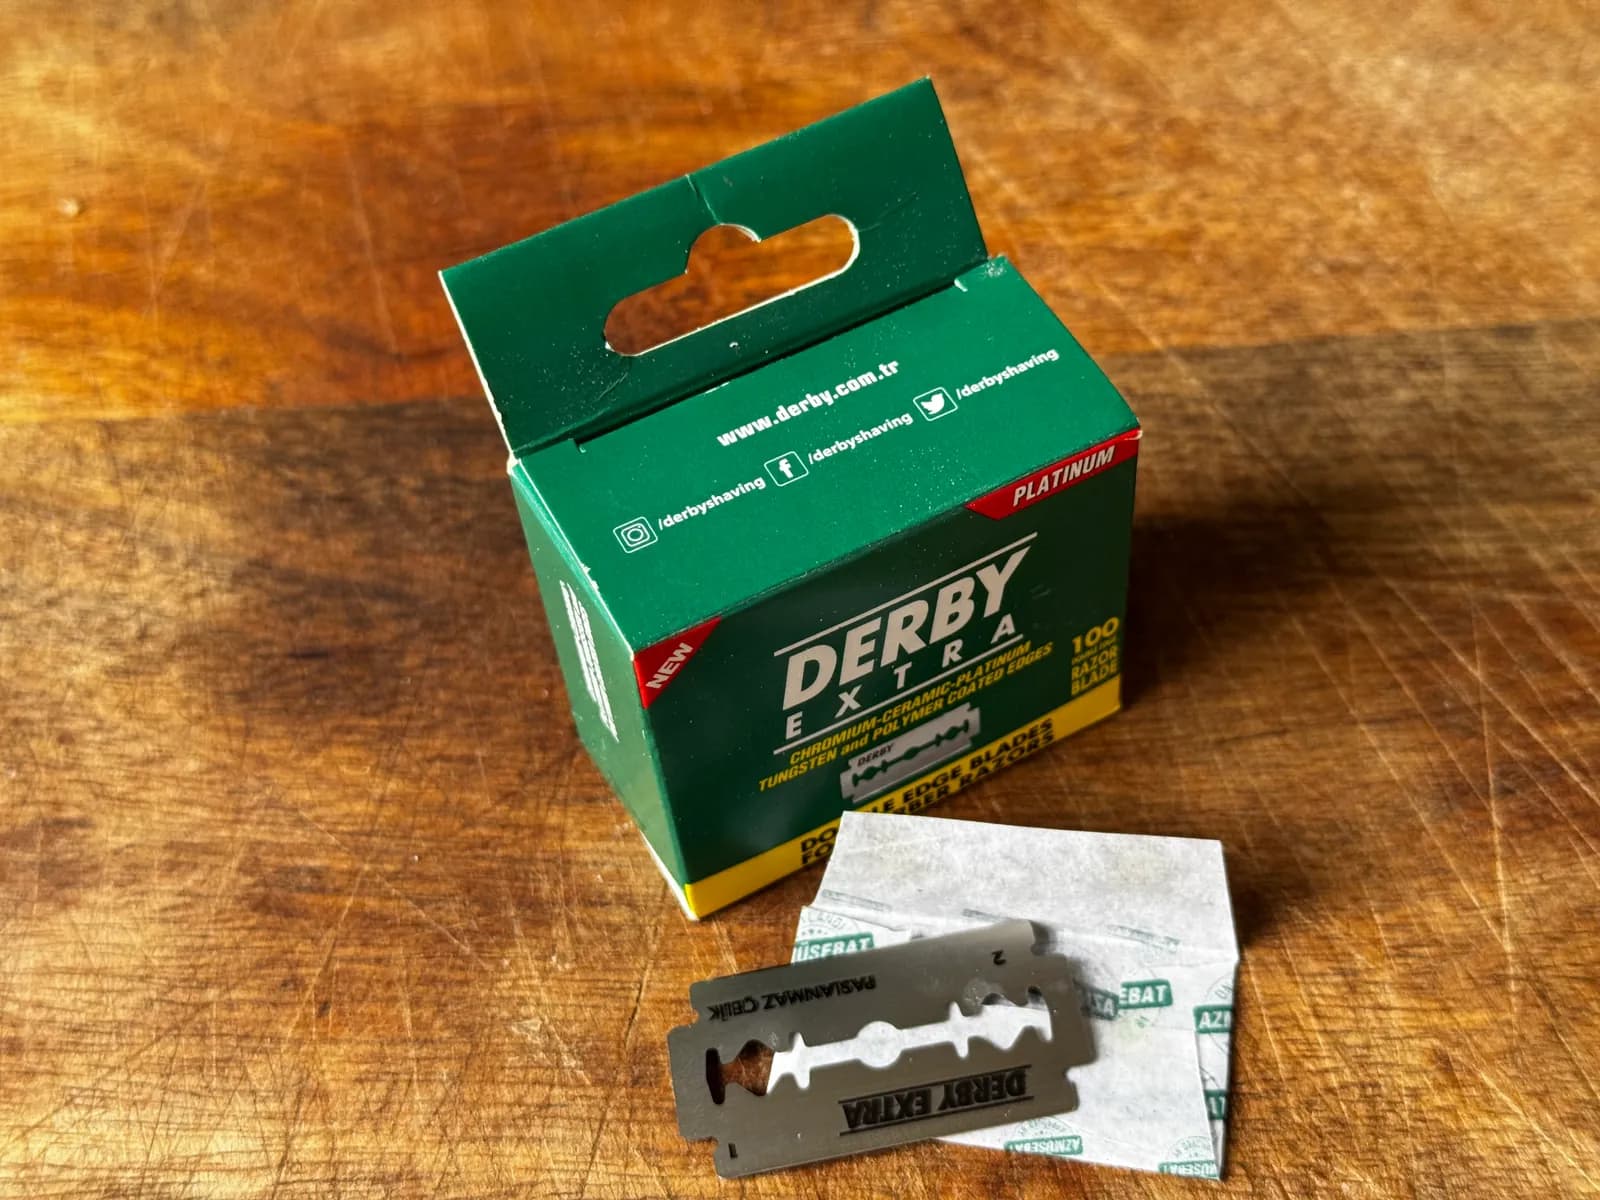
Derby Extra Double Edge Razor Blades, 100 Pack

EssentialBuy nextBudget

Buy the shaving blades, not the baking ones. They are the same blades, and a hundred of them costs a fraction of what a small pack costs once it has been repackaged for bakers. Flour the loaf before you score it and the cut will be clean.

Do I actually need one? YesBest for Anyone who wants their loaf to open where they intended rather than wherever it likes

You need something genuinely sharp to score with, and a kitchen knife is not it. Scoring is a single clean cut through the skin of a proven loaf. A knife blade is thick enough to drag the dough rather than part it, which tears the surface and deflates what you have spent hours building. A razor blade cuts before the dough knows it has been touched. What you do not need is to buy that blade from a baking brand.

What it does, and why this one

Cuts the surface of the loaf just before it goes in the oven, giving the expanding dough a controlled place to open. Without it the loaf bursts along whatever seam is weakest, usually somewhere untidy around the side.

It is the same blade the baking world sells at a considerable markup, bought the way shavers buy it. A hundred double-edge blades cost very little, they fit every lame holder on the market, and they come individually wrapped in a card box with no plastic. There is no such thing as a special baker's razor blade. There is only a razor blade.

Pros

  • A hundred blades is effectively a lifetime supply for a home baker
  • Individually wrapped, so the box stays tidy and safe
  • Fits any standard double-edge lame holder
  • Genuinely sharp out of the wrapper

Cons

  • Loose razor blades in a kitchen need storing somewhere deliberate
  • Loading one into a lame holder is the most dangerous moment of the process
  • Sold as shaving blades, so Amazon runs an 18+ age check at checkout

Our experience

I have had the same box three years and I am not a quarter of the way through it. A blade lasts at least a dozen loaves before it starts dragging, and it has two edges. I score with a bare blade held in my fingers, carefully, and have never cut myself in three years - but I also printed myself a lame holder, so both approaches live in the same tin. Two things I have learned. Score dry, and throw a dusting of flour over the top of the loaf first: the blade parts a floured surface cleanly instead of pulling at it. And a baguette needs a fresher blade than a boule does. A 500g loaf pushes back against the blade, so an older edge is fine, but a lighter baguette has so little resistance that a dull blade drags the dough along rather than cutting it.

Alternatives

A purpose-made lame holder if you would rather not handle a bare blade, and they take these same blades. I 3D printed mine, which is a good option if you have a printer - it costs pennies and works exactly as well as a bought one. Whether you use a holder at all is genuinely personal: if you are confident with a bare blade that is fine, and if you would rather have the safety net that is equally fine.

Will you outgrow it?

No. You will still be using this box of blades years from now.

Works well with

Clear Round Starter Tub, 700ml

Nice to haveBuy nextBudget

Clear, round, taller than you think you need. Mark the feed line and the target line with tape and a marker, rest the lid on rather than clipping it shut, and this is the last starter container you will buy.

Do I actually need one? YesBest for Anyone keeping a starter, which is anyone baking sourdough

You need somewhere to keep your starter, and it should be clear, round and considerably bigger than the starter itself. That is the whole specification. There is a healthy trade in ceramic sourdough crocks and branded starter jars, and they are pleasant objects, but an opaque crock hides the one thing you actually need to see - how far the starter has risen since you fed it. That is how you know it is ready. Buy a clear plastic tub and put the difference towards flour.

What it does, and why this one

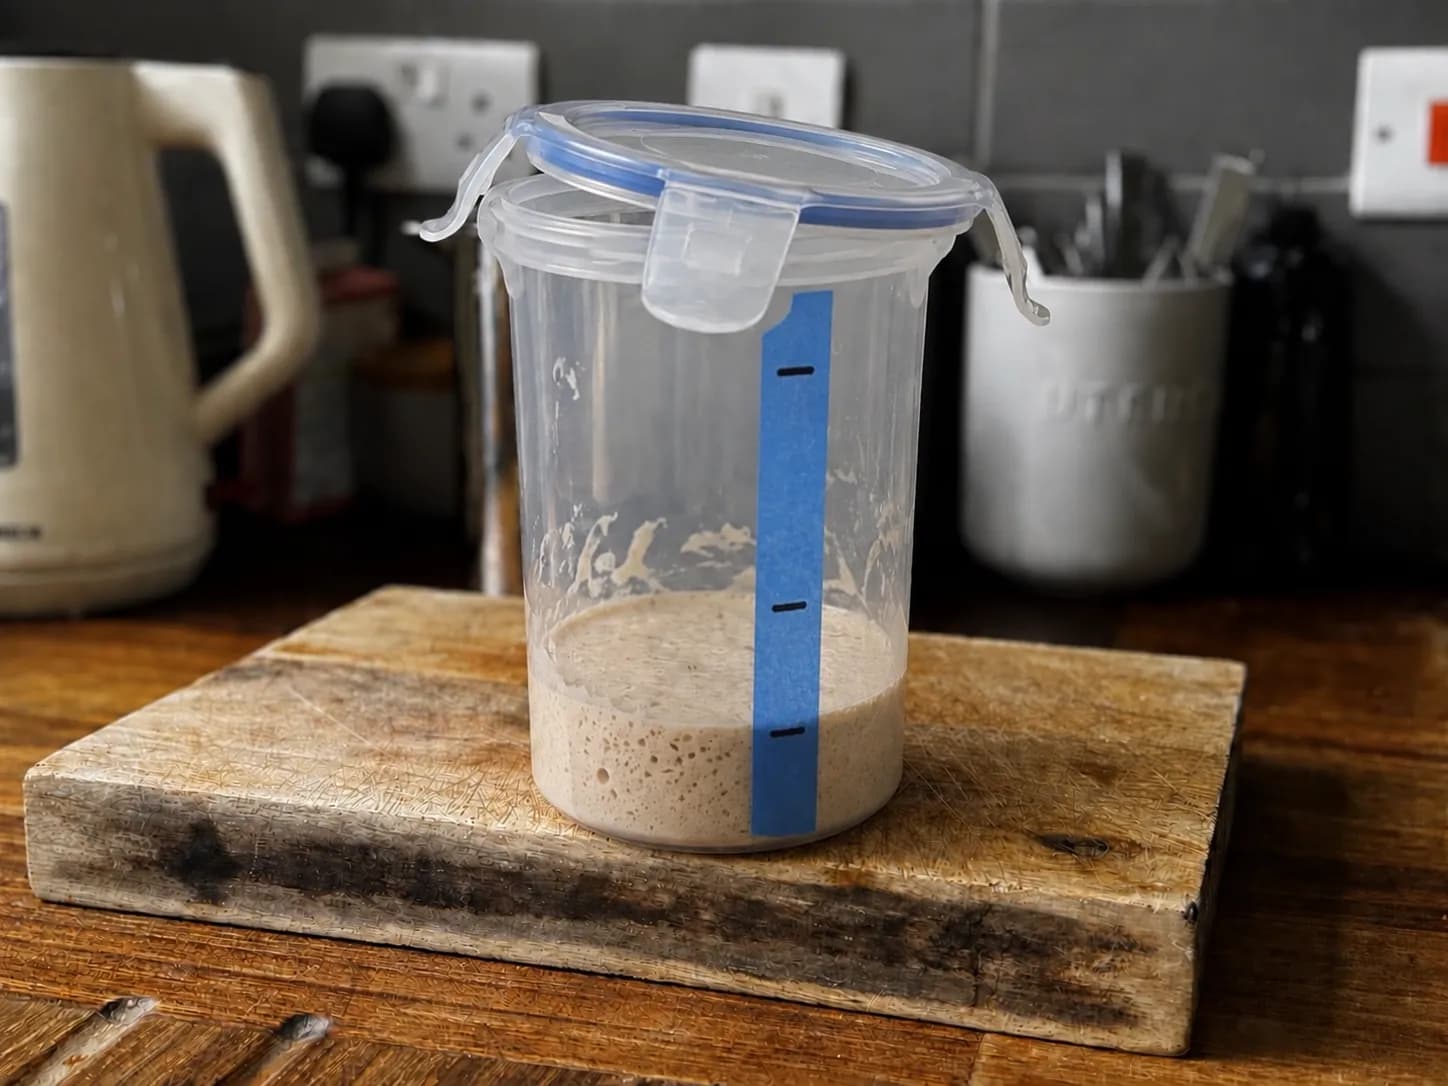
Holds the starter between feeds, lets you watch it rise, and goes in the fridge when you need to slow it down. The rise is the reading you take before every bake - a starter that has doubled and is holding is ready, one that has risen and collapsed has peaked and gone past it.

Round, clear, straight-sided and much taller than the starter needs. Round matters more than it sounds: a square container has corners, and corners hold starter that a spatula cannot reach cleanly, which makes both feeding and washing up more work than they need to be. Tall matters because a lively starter can climb further than you expect, and the difference between plenty of headroom and not quite enough is the difference between a rise and a mess on the worktop. Around 700ml is the sweet spot for a modest starter - big enough for the climb, small enough to fit on a fridge shelf.

Pros

  • Clear sides, so you can read the rise at a glance
  • Round profile empties and cleans easily with a spatula
  • Enough headroom for a lively starter to climb
  • Fits a fridge shelf when you need to slow things down
  • Costs very little

Cons

  • The airtight seal is the one feature you mostly cannot use
  • Clamp it shut on an active starter and pressure builds
  • Resting the lid on instead makes the locking clips redundant

Our experience

I have used a tub like this for at least three years. Before it I had a square container, and I replaced it purely because of the corners - getting the starter out cleanly and then washing it up afterwards was more of a job than it should have been. With a round tub and an ordinary silicone spatula it takes seconds. I keep about 150ml of starter, which barely covers the base and comes maybe a centimetre up the side, and all the rest of that 700ml is headroom for the climb. I run masking tape up the outside with marker pen on it: one line where the starter sits after feeding, another where I know it needs to reach before it is ready. When I am away I seal the lid properly after a final feed and put it in the fridge, and it has sat there for two or three weeks quite happily. It takes a couple of feeds to come back to full strength, and then I am straight back to baking.

Alternatives

A large Kilner-style jar works, but the shoulder curves in at the top which makes the rise harder to read and the last of the starter harder to reach. Avoid square containers for the same reason. A ceramic crock looks lovely and hides everything you need to see.

Will you outgrow it?

Only if you decide to keep a much larger starter. The tub itself will outlast several starters.

Works well with

Wildone Stainless Steel Mixing Bowls, Set of 5, with Lids

Nice to haveBuy nextMid range

Buy them for the two bowls you will actually use and treat the rest as a bonus. Weigh into a small bowl and tip into the big one, never the other way round. Ignore the graters.

Do I actually need one? YesBest for Anyone mixing by hand, which for sourdough is most people

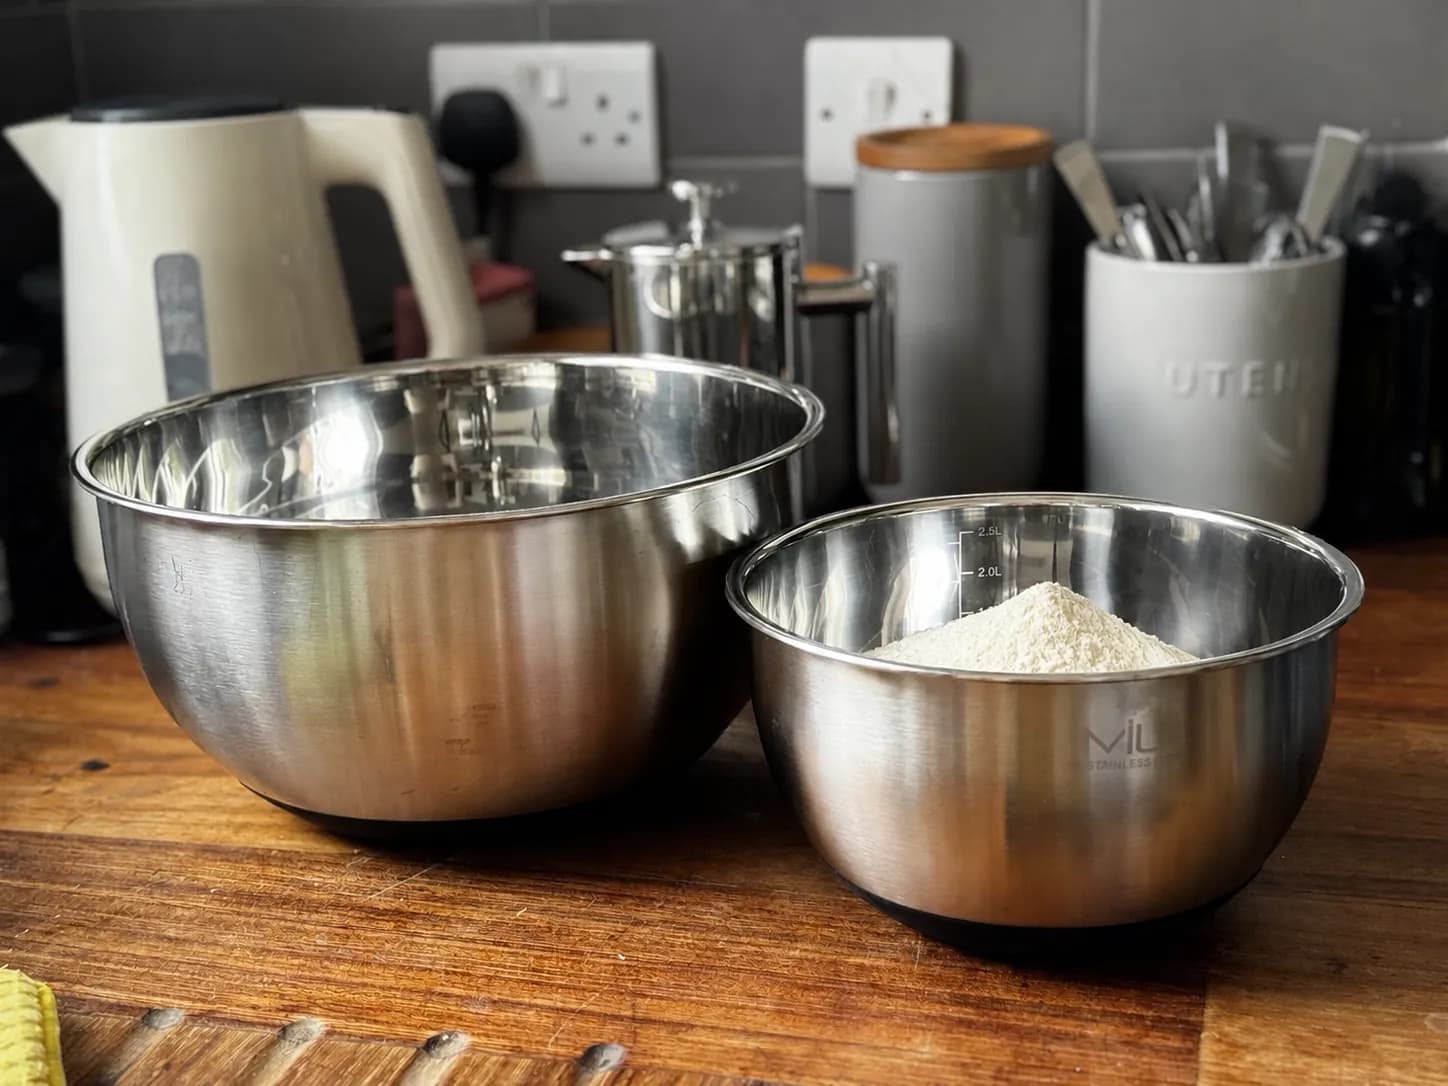
You need bowls, and you need more than one. That second part is the bit worth explaining. Weigh your water into the big bowl, then tip flour straight in after it and overshoot, and you cannot take the excess back out - it is already wet. Weigh the flour into a smaller bowl first and tip in what you need, and an overshoot costs you nothing. One large bowl to work in, one or two small ones to weigh into, is the whole system.

What it does, and why this one

The largest bowl is where the dough gets mixed and where it bulk ferments. The small ones are staging: flour, salt, starter weighed out separately so nothing goes irretrievably into the wet mix by accident. The lids turn the big bowl into a fermentation vessel with no clingfilm or tea towel needed.

Stainless rather than glass or plastic: it does not stain, does not hold smells, does not chip, and is light enough to lift a full bowl of dough one-handed. The set nests, so five bowls take up little more room than the largest. The lids are the sourdough-specific advantage - a sealed bowl for bulk ferment means no clingfilm and no tea towel drying the surface of the dough. The non-slip silicone base matters more than it sounds when you are doing stretch and folds with one hand and holding nothing with the other.

Pros

  • Stainless takes years of use without denting, staining or rusting
  • Nests down to almost nothing
  • Lids replace clingfilm entirely for bulk fermentation
  • Non-slip base holds the bowl still one-handed

Cons

  • Five bowls, and realistically you will use two
  • The three grater attachments do nothing an ordinary grater does not
  • Flat lids, so a large bulk ferment can rise into the underside and stick
  • Lids are officially hand wash only

Our experience

No dents, no rust, no marking of any kind - they look essentially as they did new. I bulk ferment in the largest bowl with the lid on and it has replaced clingfilm completely, with the one caveat about a big batch reaching the lid. I do not miss being able to see the dough through the side, incidentally. You learn roughly how long a bulk ferment takes in your kitchen, and then you lift the lid and look rather than watching it through glass every five minutes. The non-slip base has only ever struggled with a really stiff dough, where I have wrapped a damp tea towel round the base to hold it - at normal hydration it stays put fine.

Alternatives

Any large bowl plus a couple of small ones will do the job. Glass lets you see the dough rise, which some people like, but it is heavier and it breaks. What matters is having more than one bowl, not which bowls they are.

Will you outgrow it?

No. Stainless bowls are a once-in-a-lifetime purchase, and the ones you do not use now may find a job later.

Works well with

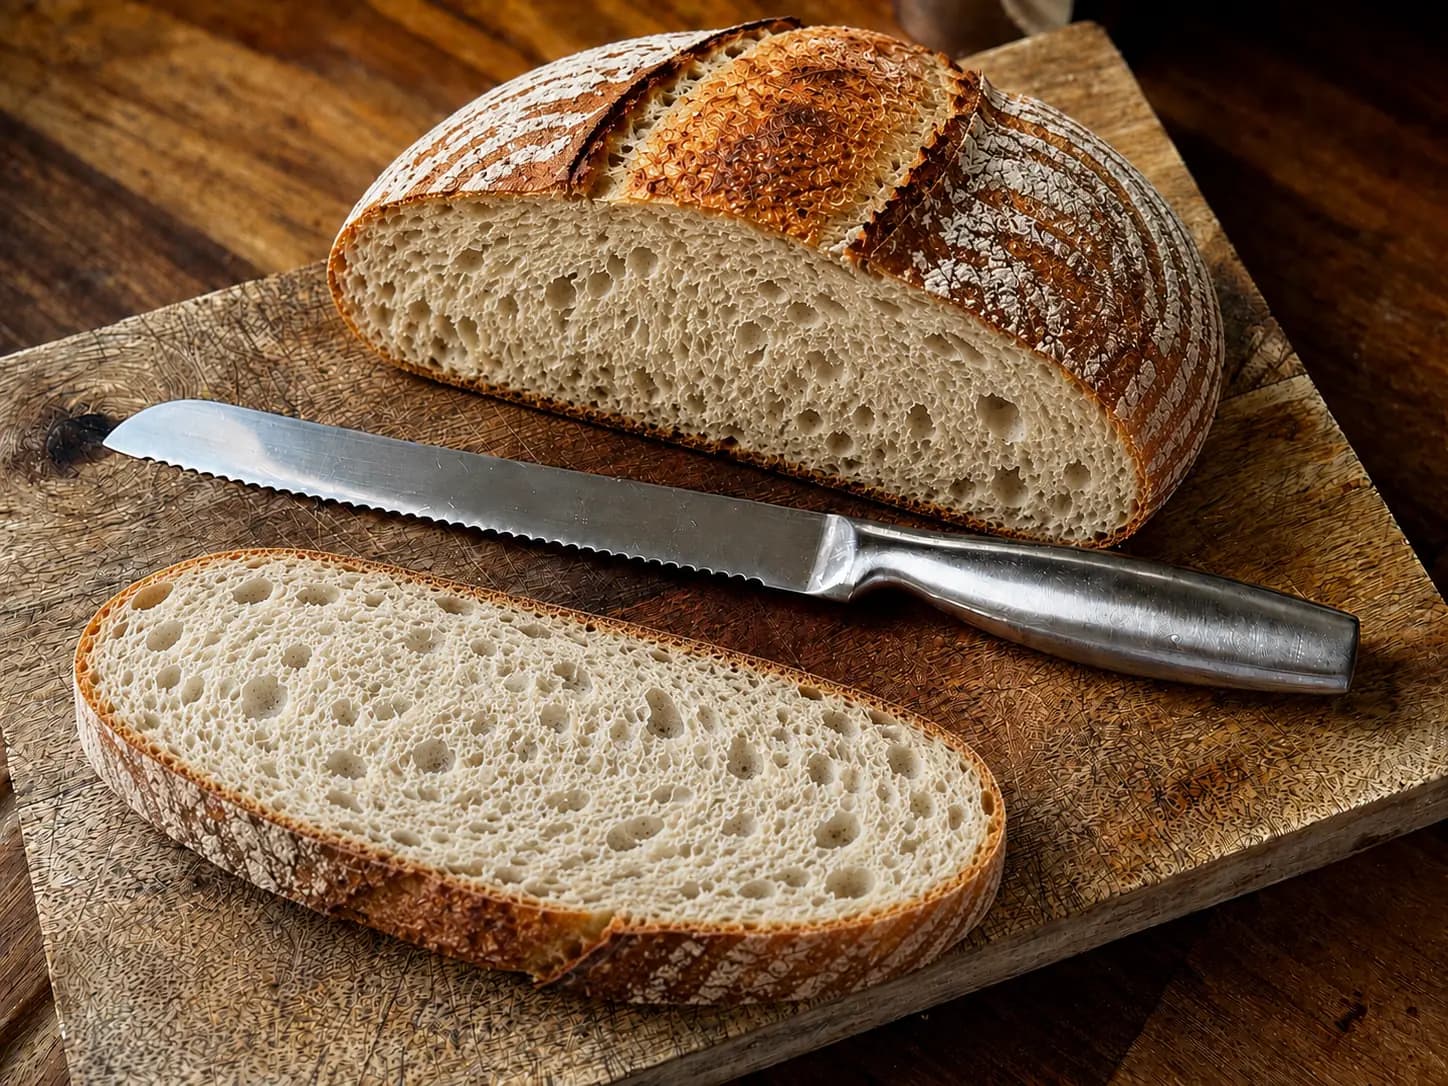
Serrated Bread Knife, 9 inch

EssentialBuy nextBudget

Buy something sharp rather than something expensive, at least nine inches, and keep it somewhere it will not be blunted by other cutlery. Two things that are not about the knife: let the loaf cool completely before you cut it, and revive a day-old loaf rather than fighting it.

Do I actually need one? YesBest for Anyone baking a loaf they then have to slice, which is everyone

Yes, and the axis that matters is sharp versus blunt, not cheap versus expensive. A sourdough crust is far tougher than a supermarket loaf, and the base is tougher still because it has spent the bake sitting on the hot floor of the pot. A blunt serrated knife struggles in two specific places: starting the cut through the top crust, and finishing it through the base. A sharp one goes through both without you noticing. Since a serrated edge cannot practically be sharpened at home, this is closer to a consumable than an heirloom - which is a good reason not to spend a fortune on it.

What it does, and why this one

Cuts through a hard crust without crushing the crumb underneath. The serrations saw through the crust while the blade passes through the soft interior, which a straight edge cannot do - it compresses the loaf ahead of itself and you end up with a squashed slice.

Nine inches of blade is comfortably more than the width of a 500g loaf, so you cut in one pass rather than sawing across in stages. Beyond blade length and sharpness there is not much to choose between bread knives, which is the point. Ours came from IKEA and cuts beautifully. Buy something sharp with enough length and spend the difference on flour.

Pros

  • A sharp blade makes the base of the loaf as easy to cut as the top
  • Nine inches clears a standard loaf in one pass
  • Inexpensive knives do this job perfectly well

Cons

  • A serrated edge cannot practically be sharpened at home
  • Loose in a drawer against other cutlery it goes blunt faster than it needs to

Our experience

Ours is an IKEA knife, about eight months old, and it still cuts as well as the day we got it. We also still have the old blunt one, so the comparison is direct rather than remembered - and it is not subtle. The old knife struggled to start the cut through the top crust, and struggled far more at the base, where the crust is hardest after sitting on the floor of the Dutch oven. Getting that last bit of the slice off was a genuine effort. With the new one the base cuts as easily as the top. Technique matters too: do not press. Light pressure and let the teeth do the work, and the loaf keeps its shape.

Alternatives

Any sharp serrated knife of about nine inches. Brand makes far less difference than sharpness.

Will you outgrow it?

You will not outgrow it, but you will eventually replace it when it goes blunt, because a serrated edge cannot be brought back.

Works well with

Want someone to show you how to use all this? Find a sourdough class near you

Common questions

Do I need a stand mixer for sourdough?

No. This is worth being blunt about, because a stand mixer is by far the most expensive thing anyone will try to sell you for bread baking. Sourdough is not kneaded in the way an enriched dough is. You mix it, you let it rest, and you do a few sets of stretches and folds over the first couple of hours. There is no long kneading stage for a machine to save you from. A stand mixer earns its place with brioche, cakes and large batches - it does not earn its place with a single sourdough loaf. We own one. It rarely comes out for sourdough. If you are choosing between a stand mixer and everything else on this page, buy everything else on this page and you will still have money left.

Do I really need scales? Can I use cups?

You need scales, and this is the one item on the page there is no argument about. Sourdough runs on ratios and ratios only work if the numbers are real. The worst offender is water, because a jug has millilitres printed on the side and it feels like a measurement. Try this once: fill a jug to what the markings say is 300ml, then put it on a set of scales. It will almost certainly not weigh 300g. That gap is why your dough is wetter or stiffer than the recipe intended, and why you cannot work out what went wrong. Weigh your water.

Do I need a banneton, or will a bowl and a tea towel do?

A bowl and a tea towel does work, and plenty of people start that way. It works better in theory than in practice. Unless your bowl and your towel are well matched, the towel bunches up in the base, the dough settles into the folds, and getting it out again without knocking the air out of it is a job. The loaf tastes the same. It comes out with the creases printed into the crust. A banneton is inexpensive, it lasts for years, and it gives you the spiral pattern people associate with a sourdough loaf. It is a small problem worth buying your way out of.

Can I cut the loaf while it is still warm?

You can, but you should not, and this is the hardest rule to follow in sourdough baking. A loaf is still cooking when it comes out of the oven. The interior continues to set as it cools, and cutting into it early gives you a gummy, compressed crumb rather than an open one. The flavour is still developing too - a sourdough that has cooled completely tastes noticeably more of itself than one cut hot. Wait. It is worth it, even when there is butter on the side.

How do I revive a day-old sourdough loaf?

Wet it and put it back in the oven. Sprinkle water liberally over the crust - you can run it briefly under the tap if you are feeling confident - then bake at around 180C for five to ten minutes. It comes out with a softer, fresher crust and a texture much closer to the day it was baked. This also makes an older loaf far easier to slice, because the crust stiffens as it stales and a hard base crust is what blunt bread knives struggle with most.

What is the one thing that makes the biggest difference?

A covered cast iron pot, closely followed by scales. A professional bread oven injects steam at the start of the bake, which keeps the crust soft long enough for the loaf to expand properly before it sets. A covered pot does the same job by trapping the steam the dough gives off. Bake the same dough uncovered on a tray and it will set early, stay pale and rise less. It is the single piece of equipment that most changes how the finished loaf looks.

Some links on this page are affiliate links. If you buy through them, BakeClass may earn a small commission at no extra cost to you. As an Amazon Associate, BakeClass earns from qualifying purchases.